
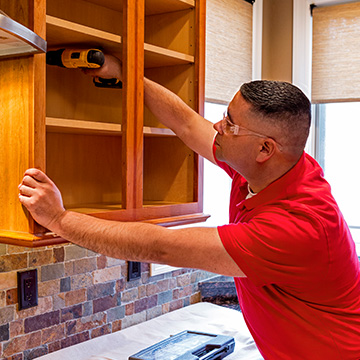
While many Do-it-yourself home projects can be satisfying, not all of them will add value to your home. Bad DIY projects can actually lower your home's value. Do not focus on DIY projects if you want to increase the value of your home. Hire a professional instead of taking on projects you don't think you can do. We'll be discussing common DIY mistakes and how to avoid them in this article.
Do-it yourself projects are not worth the cost of a home.
While DIY projects can add a bit of spruce to your home, they won't add much to its value. Buyers will see the changes, but for the wrong reasons. They may think that you did the work yourself, and you may lose the chance to get top dollar at resale. Here are some tips and tricks for homeowners that will make DIY projects a success.
First, you should ask yourself, "Why would I want to spend money on DIY projects? What kind of improvements will add real value to my home?" The answer is a combination of both. Consider investing in a full house renovation if your home is being renovated. These projects can be done easily and don't require a large budget. Make sure to be aware of potential risks when you do DIY projects.
Millennials are more inclined to take on home projects by themselves
Bernzomatic (a company that makes handheld blowtorches) found that millennials have the highest DIY skills. Nearly half of all millennials agree that they are comfortable making small home improvements themselves. Only one-third are comfortable with larger DIY projects such painting exteriors or hanging lights.
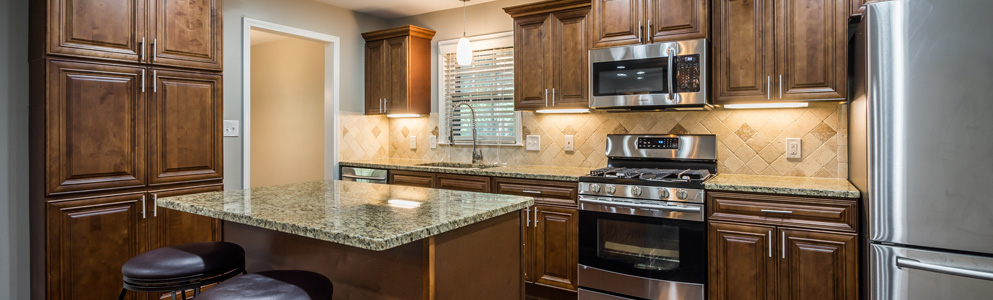
The reason that millennials are more willing and able to handle their own home improvement projects may have something to with how they value time. Many millennials had two jobs as a child. This means that millennials don't want a lot of different jobs to take care and maintain their home. The value of money is higher for millennials than it is for others. They are willing to invest money in a home renovation project before they have even begun. Millennials are also more likely to choose low-maintenance materials, such as wood-look flooring and quartz counter-tops.
Make sure you avoid these common mistakes
There are several common DIY homeowner mistakes to avoid, from making a mess to breaking a valuable item. Even though most DIY mistakes involve spilled paints, even minor ones can lead you to expensive repairs. These common errors can be avoided by planning well and paying attention to details. These mistakes can be avoided by following the safety precautions and carefully following instructions. Below are some common errors that you can avoid. Before you make any decisions, it is important to be aware of all the possible risks.
80% of homeowners make mistakes when performing home DIY projects. These mistakes can endanger a homeowner's property, injure their family members or cause them to lose their money. There are many risks associated with home improvement projects. This guideline will help you avoid making costly mistakes and avoiding costly injuries when you tackle a home renovation project. If you're going to attempt DIY home repairs, make sure you read the instructions carefully and follow the correct procedure.
FAQ
What is the best time to hire a handyman for your project?
There isn't really a "right" time to hire a handyman. It is important to start as soon as you can. You can save money by waiting until after the holidays. You can also reach out to various handymen via the phone.
Can a handyman give me suggestions for how to improve my home's condition?
Absolutely! Handyman training is in all areas of home repairs and maintenance. He or she knows what needs to be fixed and what doesn't. Don't be afraid to ask for help whenever you need it.
What happens if a handyman causes damage and I am unsatisfied with his work?
Notify your contractor immediately if there is a problem with the project. It is best to note down what happened and attach photos. Call your insurance company, and make a claim.
What are the most frequent handyman repairs that you need to make?
Handymen are often called upon to repair roofs and windows, doors, gutters or siding. They also can install hot water heaters, air conditioning units, electrical systems, sheds, decks, fences, sheds and other items. Handymen can help with home improvement and building projects that are not feasible for DIY homeowners.
Can a handyman install new appliances or fixtures?
A handyman can certainly help you out with these types of projects. Be sure to identify the appliance or fixture that will be installed before you start.
Is there anything I should do before I hire a handyman.
Hire someone with experience in the type of project you are looking for. It is also a good idea to ask for references and inquire about past customers. You may also want to include some extra money to cover unexpected expenses. It's important to check that your dog is licensed and insured.
How many hours is it typical to complete a DIY project of this nature?
On average, DIY projects take between 2 and 4 hours. The complexity and difficulty levels of the project determine the length.
Statistics
- Mila keeps a commission of 20% for each completed service performed by Friends and charges various service fees regarding work done by Pros. (appjobs.com)
- “Once the pandemic hit, that number fell to about 20%.” (inquirer.com)
- Our handyman services for seniors are provided by professional senior helpers who have been serving the community for over 20 years with 98% customer satisfaction. (cantatahomeservices.org)
- More than 20% of homes in America have outdoor living spaces, including decks and patios. (mrhandyman.com)
- A franchise was approximately $110,000 with a franchise fee of $14,900, according to a spokesperson for a national handyman franchise. (en.wikipedia.org)
External Links
How To
How to Install an Receptacle Box
You should follow all guidelines provided by your local building inspector when installing any type or outlet. This includes making sure that the wiring is correctly installed and that there aren't any fire hazards or water damage.
The majority of boxes come prewired, with four wires coming out of the breaker panel. The black and red wires will run through the box to one end, while the white and red wires will go to the other end. It is very important to make sure that you do not use wire nuts and wrap around the screws when connecting these wires together. If this happens, you will probably have trouble getting the wires to stay in place after they are tightened down. These wires should be free to move, but not tight enough to cause them to pull out of the holes.
A second piece of hardware might be required if you wish to add a receptacle or container to an existing box. You will need to remove the metal box's top and attach a cover plate. Once the hole has been made for the new device and the cover plate has been attached, it's time to attach all wires.
You might be able to replace your existing light switches with modern ones by yourself. The first step is to take the old switch out of its mounting spot. The next step is to unplug any wires attached to the switch. These wires include the power that goes into the switch and the ones that provide electricity to the lights in your room. After everything has been disconnected, it's time to begin the procedure of replacement.
After removing the old switch, you'll need to measure the distance between the wall studs and mark them with a permanent marker. Once this is done, you will need to determine if your new switch should be mounted higher than or lower than the floor. Depending upon the height of the switch, you'll need to drill a hole to mount the bracket or attach it directly to drywall using drywall anchors.
After you have taken measurements and marked the locations, you can begin the project. With the help of a friend or family member, you can start removing the drywall surrounding the area where the switch will be installed. To avoid accidentally cutting the cable in the wall, leave 8 inches between each stud. Next, you will need to install the new switch using the appropriate mounting brackets. Next, attach the cables and secure the switch onto the mounting brackets. Once the switch has been fully installed, you will need to turn the power back on and test the newly added device to ensure it works properly.